ブログ
/ Durable tools & features
How to create an e-commerce website with Durable
February 25, 2025
5
読むのにかかる時間(分)
Did you know you can use Durable to create an e-commerce website so you can sell physical and digital products online?
All you need to do is generate a website and add a link from Stripe. Soon you’ll be stocking, selling, and shipping your way to e-commerce excellence.
Keep reading to learn how to set up an e-commerce website with Durable.
How to create an e-commerce website with Durable
Step 1: Generate a Durable website
Head over to the Durable's AI Website Builder, enter your business type, name, and location. Click "Generate" and watch your website build itself.
When it’s ready, make any tweaks or customizations using the website editor. Add your logo, photos specific to your business, and anything else you feel is critical to have on your website.
If you already have a Durable website, you can skip this step and log in to your dashboard instead.
Step 2: Create a Stripe account
Visit Stripe and create an account.
In most cases, getting set up on Stripe takes just a few minutes.
Step 3: Add a product to Stripe
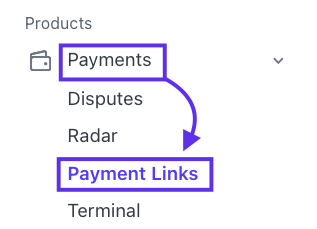
Log in to your Stripe account dashboard. Click Payments from the menu at the top of the screen.
Click "Create a payment link". Enter a name for your product, then click "Add". You then have the opportunity to enter product details, an image of your product, and the price. When you’re done, click "Add product".
In the top right corner, click the "Create link" button. On the next page you’ll see a unique link to this specific product. You’ll need this link in the next step, so keep this tab open.
Step 4: Create a product page
The most basic part of any e-commerce website is a single product. So we’ll start by creating a page for one product that you want to sell.
Make sure you are logged in to your Durable dashboard. Click "Website" from the left menu, then click the "Edit website" button on the top right.
From the drop-down menu at the top left of the website editor, click the "Add" button, select "Pages", and "Blank page".
Enter a name for your product as the page title. Click "Save".
Your new product page will have the same header, menu, and footer as your homepage, but the middle section will be blank and ready for your input.
Click "Add section" and search for the "Text + image" block.
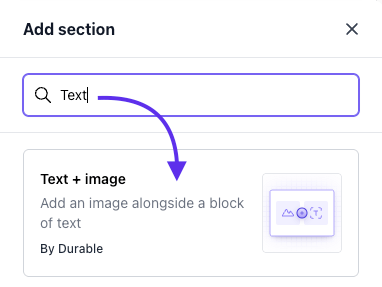
Enter the name of your product, details about it, and pricing. Make sure the information you enter here matches the details you entered in Stripe.
Add a photo of your product (make sure it's the same photo you used in step three). If you don’t have product photos, you can search for any image you like in the Media library.
Turn the "Button" toggle on. Give the button a call to action like "Buy" or "Buy now". Under "Link", choose "External" and paste in the unique Stripe link from step three.
Click "Save".
And that's it! You’ve now added a product page with a link to Stripe so that customers can purchase from your website.
Step 5: Create a shop page
Your website needs a home for your products. From the drop-down menu at the top left of the website editor, click the "Add" > "Pages" > "Blank page".
Add a name for your shop page. You can name it "Shop" if this will be your only shop page. In your page settings, under "Show link" make sure "Header" and "Footer" are toggled on so that visitors to your website can navigate to your shop page easily. Click "Save".
In the blank area of your shop page, click "Add section" > "List".
Durable automatically generates three entries in the list block, but you may want to manually add the specific products you'll be selling.
Step 6: Add products to your shop page
Now that you have a shop page, it’s time to populate it. Move your cursor over the list block and click the three dots, and navigate to "Edit section".
From this menu, you can customize the look and feel of your product listings. Use the toggle buttons to choose which features you want for each listing — we recommend choosing "Image", "Heading", "Content", and "Button".
Under "List items" in this menu, you’ll see three placeholder entries. You can replace these by adding your own text, product images, and links. Add more products using the "Add a service" button.
Click the edit (pencil) icon next to each product to customize it. Add the same photo and title that you used in the previous steps. You also may want to write a short description of the product here. Include a button with a clear call to action like"View" or "Learn more". Use the "Link" dropdown menu to select Page, then choose the appropriate product page, and the link will be created automatically.
If you need to delete a product, click the trash can icon next to it.
When you’re happy, click "Save".
Step 7: Add more products
If you want to add more products, all you have to do is:
- Add another product to Stripe using the "Create payment link" button
- Copy the unique link for the product
- Create a product page in Durable for the new product
- Under "Button", paste the unique link from Stripe into the "External" link field
- Add the new product to your shop page by using the "Add new service" button
And there you have it, you just set up your e-commerce store on Durable.


